Color Gradient Anodizing: Process, Design, and Cost Guide
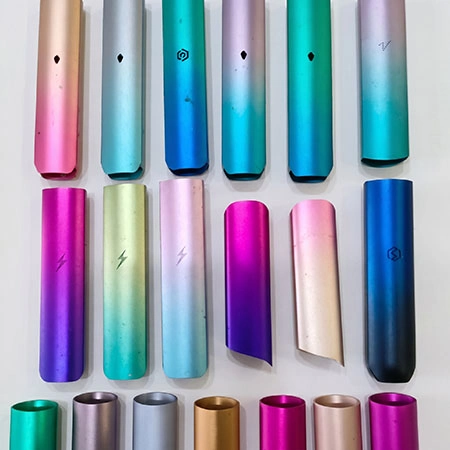
Unlike paint or a coating applied to the surface, the color forms within the oxide layer that grows from the aluminum. The finish is durable, but the final color depends on the material and process. Alloy, surface preparation, dyeing control, and part geometry can all affect the result.
For gradient anodized aluminum parts, a color reference on a screen is only a starting point. Different alloys can respond differently in the dye bath, so it’s worth considering the process, design limits, potential defects, and cost before production.
What's in this guide
1. What Is Gradient Anodizing?
Gradient anodizing gives aluminum a gradual color fade. The part may shift from dark to light in a single color, or blend two or more colors through staged dyeing. The gradient forms within the anodic oxide layer rather than in a coating applied to the surface.
The finish usually takes one of two forms:
- Single-color fade: one end has a deeper shade, fading to a lighter tone at the other.
- Multi-color transition: masking or staged dyeing creates distinct color zones with a blend between them.
The result depends on the alloy, surface texture, anodizing conditions, dyeing, masking, and sealing. Because these factors affect one another, a physical sample is a more reliable reference than a swatch code for color gradient anodizing.
The finish is often used on consumer electronics housings, audio and personal-device bodies, speaker and lighting components, and other visible hardware. On these products, the surface is handled and seen up close, so appearance matters alongside dimensional accuracy.
2. How Does the Anodizing and Coloring Process Work?
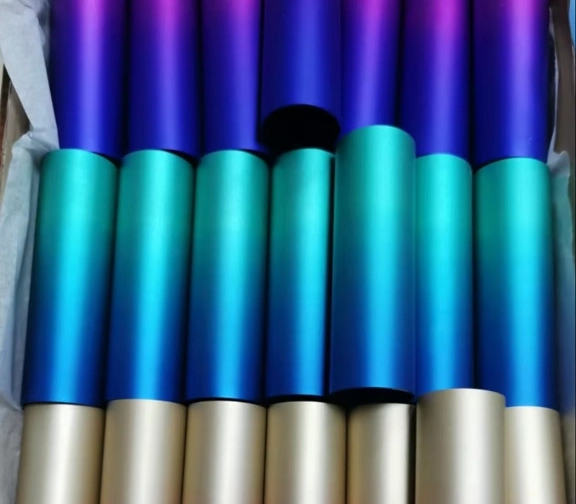
The gradient anodizing process is easier to follow if you separate it into three steps. How does gradient anodizing work at the surface level? The short answer is that the color is created in the middle step, while the first and last steps decide how well it holds.
1. Anodic Oxide Formation
When aluminum is made the anode in an electrolyte bath, current drives the growth of a porous oxide layer on the surface. That layer is not a passive film. It is a structured coating with vertical pores, and those pores are what make coloring possible at all. The thickness and the pore structure set the ceiling for how much dye the surface can accept.
2. Dye Absorption
Dye molecules enter the pores of the oxide layer and color the part from the inside out. This is the stage where a gradient is created. If different areas of the same part experience different dyeing conditions, they end up at different depths of shade, and the transition between them reads as a gradient. Controlling that exposure is the whole craft of the process.
3. Sealing
After dyeing, the oxide layer is sealed to stabilize the surface and the color. Sealing closes the pore structure, so it is part of appearance control as much as it is part of performance. Anodizing and dyeing normally run as a sequence of anodizing, coloring, and sealing, and the sealing stage is where a good color can still be lost if the conditions are off.
Sequence matters: A gradient is not applied after the fact. It is decided by when and where the part meets the dye, which means the process route has to be planned before the part is racked, not adjusted at the end.
3. Three Methods for Creating Gradient Anodizing Effects
There is no single way to produce a gradient. The method is chosen from the part geometry, the color layout, and the quantity. The three approaches below cover most production work.
Controlled Lift Dyeing
The part is mounted on a rack, and the way it enters, moves through, or leaves the dye bath is controlled. By managing the lifting, lowering, or oscillating motion, different areas of the part spend different amounts of time in the dye. This is the most direct route to a gradient that runs along the length of a part, and it suits long or cylindrical components where the transition follows one axis.
Two-Color or Multi-Color Dyeing
Multi-color anodized aluminum is built through masking, staged dyeing, or repeated processing passes. As design directions, combinations such as gold to green or purple to blue are useful references for a conversation about appearance. They are starting points for a color scheme, not standard stock colors, and each one has to be developed against the actual alloy and approved on a physical sample.
Masking and Patterned Coloring
Where the process allows it, masking or patterned treatment can add a logo, lettering, or a defined color block alongside the gradient. Whether this works depends on the part. Complex curved surfaces, deep recesses, and tight features make masking harder to hold cleanly, so feasibility should be evaluated per part rather than assumed from a drawing.
| Method | How it works | Best suited to | Main risk to review |
|---|---|---|---|
| Controlled lift dyeing | Movement through the dye bath is controlled so exposure time varies across the part | Long, cylindrical, or single-axis parts | Transition smoothness and repeatability |
| Two-color or multi-color dyeing | Masking, staged dyeing, or repeated passes create separate color zones | Parts with a defined split or a designed multi-tone look | Edge definition between zones |
| Masking and patterned coloring | Masking or patterned treatment adds logo, text, or local color blocks | Parts with flat or gently curved cosmetic areas | Masking residue and definition on complex shapes |
4. Key Parameters That Affect Gradient Color Quality
Gradient anodizing color consistency is not controlled by one setting. It comes from holding several parameters inside a window at the same time, and the window is specific to the alloy and the color being produced.
Oxide Film Thickness
The condition of the oxide layer affects how much dye the surface absorbs and how the finished part looks. As a working reference for planning, a range in the order of 8–15 µm is sometimes used for decorative anodizing work, but this should be confirmed for each project rather than treated as a fixed range for all gradient parts.
Scope of that reference: Film thickness requirements depend on the application, the dye, and the product specification, and industry standards define several film thickness classes rather than one figure. Treat any thickness number as a starting point to be confirmed with the finisher, not as a specification to copy into a drawing without review.
Dyeing Time and Lift Speed
How fast the part is lifted or moved changes how the transition is spread across the surface. Lift speed, immersion time, and the stability of the motion have to be tuned together, because an uneven motion shows up directly as an uneven fade. These are exactly the settings that are proven on a sample rather than calculated on paper.
Dye Concentration and Temperature
Dye concentration and bath temperature both influence how quickly the surface takes color and how stable that color is. They are managed as a process window, not as independent dials, because a change in one shifts the effect of the other.
Sealing Quality
Sealing conditions and the post-treatment that follows can shift the final appearance and the surface state. A color that looked correct coming out of the dye bath is not confirmed until it has been through sealing and final inspection.
Racking and Masking
Rack orientation, contact points, and masking method affect the direction of the gradient, the accuracy of any masked zone, and the visibility of rack marks. Rack position is a design decision, not a shop-floor detail, because it determines where contact marks can legally appear.
5. Material and Part Design Limitations
Aluminum Alloy Selection
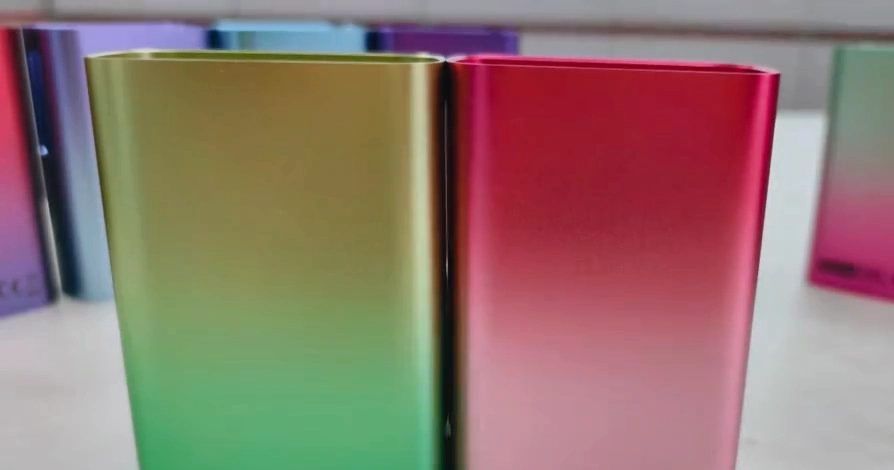
Alloy choice is where many appearance projects are won or lost, because different alloys respond differently to the same process. Points to work through before committing to a finish:
- 5xxx and 6xxx series aluminum are reasonable candidates for cosmetic anodizing projects, but the exact grade, the material lot, and the target color still need to be proven on a sample.
- 7075 can be anodized, but its color may differ from other alloys. Where appearance consistency matters, confirm this early and approve a sample rather than assuming it will match a 6061 part.
- High-silicon die casting alloys can be difficult to bring to a uniform decorative anodized finish. Provide the specific material grade so it can be assessed instead of being accepted or rejected on the category alone.
Two parts made from different alloys, run through the same line with the same parameters, can still come out looking different. That is normal behavior for the process, not a defect, which is why the material callout belongs on the drawing. If you are still selecting material, the notes on aluminum alloys for CNC machining cover how grades behave under machining and finishing.
Geometry and Cosmetic Zones
Geometry decides how evenly dye reaches the surface and how easily it drains away again. Features worth reviewing before the design is fixed:
- Deep cavities and blind holes, where dye exchange is slow
- Sharp corners and narrow slots, where masking and coverage are difficult
- Cylindrical and long parts, where the gradient direction follows one axis
- Areas where liquid cannot easily enter or drain
- Cosmetic faces versus non-cosmetic faces
- Rack contact positions and the marks they will leave
The drawing should state the gradient direction, the cosmetic zones, the masked zones, and the permitted rack contact points. Every one of those items removes a decision from the shop floor and moves it back to the design stage, where it costs nothing to change.
6. Common Gradient Anodizing Defects and How to Address Them
Most gradient problems show up as an appearance issue rather than a dimensional one, which makes them expensive to find late. Some of what gets reported as anodized aluminum color variation is a gradient control problem, and some of it is a batch material problem. Those two need different fixes, so they should be separated before any parameter is changed. The table below lists the symptoms and the causes worth reviewing first.
| Defect | Possible causes to review |
|---|---|
| Hard transition or visible color band | Lift speed, dye exposure, or bath uniformity |
| Batch color variation | Alloy or material lot, surface preparation, film condition, or dye process |
| Fading or inconsistent surface appearance | Sealing or post-process control |
| White or undyed areas | Surface contamination or masking residue |
| Visible rack marks | Rack contact location or fixture method |
| Uneven color in recesses | Part geometry, dye access, or drainage |
The countermeasures follow the same order: control the material lot, fix the surface preparation routine, verify lift speed and dyeing parameters, improve racking and masking, check sealing quality, and hold an approved sample as the color standard.
Read the table as a starting point: These entries are directions for troubleshooting, not single causes. A real defect is usually the result of several factors acting together, so changing one parameter at a time and re-checking against the approved sample is faster than guessing at the whole process.
"Gradient complaints almost always arrive as a color problem, but the cause is usually upstream of the dye bath. When the alloy lot changes or the surface preparation drifts, no amount of dye adjustment brings the part back to the approved sample. Freeze the material and the preparation first, then tune the color."
— Engineering review team, DongGuan YiTai
7. DFM for CNC Machined Gradient Anodized Parts
CNC machining and anodizing are one sequence, not two separate jobs. What the cutter leaves behind is what the anodizing line works with. Reviewing CNC machining for aluminum parts and the finishing route together at the design stage is the cheapest way to avoid a color argument later.
Define the Gradient Direction and Appearance Zones
Mark the color transition direction, the start and end of the transition, the cosmetic faces, the non-cosmetic faces, and the masked areas on the drawing or in the 3D file. A note such as "fade from dark at end A to light at end B" is far more useful than a reference image alone, because it can be measured.
Review Machined Surface Finish
CNC tool marks, blasting, brushing, and polishing all change how the surface reflects light, and that changes how the color reads to the eye. Two parts with identical dye results can look different because the surface texture is different. Surface finish requirements should be agreed before sampling, not after.
Plan Rack Contact and Part Orientation
Decide where the rack contact points sit and how the part is oriented through the dye. The goal is to keep contact marks off critical cosmetic and assembly faces. This is a decision the machine shop and the finisher should make together, because the rack position may also influence how the part is held during machining.
Validate With a Sample Before Production
Production should not start on the basis of a digital color reference. A practical validation sequence:
- CNC machine the sample part
- Confirm the surface preparation
- Run the anodizing and gradient dyeing trial
- Inspect the color transition, rack marks, and fit with mating parts
- Approve the physical sample as the production reference
How to specify gradient anodizing on a drawing
- State the aluminum alloy and temper
- Mark the gradient direction and the start and end of the transition
- Define cosmetic and non-cosmetic zones separately
- Define masked areas and any logo or text to be added
- State the permitted rack contact areas
- State the surface finish requirement before anodizing
- Provide a physical color reference or an approved sample number
- State the film thickness requirement and the applicable standard
Parts that combine machining and finishing in one supply chain are easier to control, because the surface the finisher receives is the surface the machinist intended. If the two steps sit with different suppliers, the surface preparation requirement has to be written down and verified. Suppliers who already produce custom anodized aluminum parts alongside machining can usually shorten that loop, which is the practical argument for keeping custom aluminum anodizing and shop-floor machining under one roof.
8. Gradient Anodizing Cost and Quotation Factors
Gradient work is quoted per project rather than priced from a table, because the setup effort varies so much between one part and the next. A part with a single fade along one axis and a part with two masked color zones and a logo can share a drawing format and nothing else.
Gradient anodizing may require additional setup, sampling, masking, or controlled part movement. Quotation depends on part geometry, material, color layout, production volume, and inspection requirements.
| Cost factor | What drives it |
|---|---|
| Part size, shape, and material | Alloy selection, part envelope, and how the part hangs on a rack |
| Machining and surface preparation | Surface finish requirement and the preparation steps needed to meet it |
| Gradient direction, color count, and masking | Number of color zones, masking complexity, and the definition required at each edge |
| Rack design and dyeing route | Custom fixturing and the number of process passes |
| Sampling and process adjustment | How many rounds are needed to reach the approved appearance |
| Volume, yield, and inspection standard | Batch size, acceptable reject rate, and how appearance is judged |
On cost comparisons: It is tempting to describe this finish as a fixed multiple of standard anodizing cost. That comparison only holds when it is based on your own project quotes. Setup, masking, and sampling effort vary too much between parts for a general multiplier to be reliable.
9. Frequently Asked Questions
Q: What is gradient anodizing?
A: It is a decorative anodizing approach that creates a gradual color transition on aluminum through controlled coloring of the anodic oxide layer.
Q: How is a gradient created during anodizing?
A: A gradient can be produced through controlled dye exposure, staged coloring, or masking, depending on the part geometry and process.
Q: Which aluminum alloys are suitable for gradient anodizing?
A: Suitability depends on alloy, material lot, surface finish, and target color. Confirm the exact alloy and approve a sample before production.
Q: Can CNC machined parts receive gradient anodizing?
A: Yes, CNC machined aluminum parts can be evaluated for gradient anodizing. Surface texture, geometry, racking, and cosmetic requirements should be reviewed during DFM.
Q: How can color consistency be controlled?
A: Define the alloy and surface preparation, agree on the gradient direction, validate the dyeing route, and use an approved physical sample as the production reference.
Q: What information is needed for a quote?
A: Provide the drawing or 3D model, aluminum alloy, surface finish, gradient direction, color references, quantity, and cosmetic requirements.
Conclusion
Gradient anodizing combines anodic oxidation, controlled coloring, and sealing to create a distinctive finish on aluminum parts. The final result depends on alloy, surface preparation, part geometry, dyeing parameters, racking, and sealing. For CNC machined custom parts, early DFM review and sample approval help align the design with the required appearance and production process.
The practical takeaway is that appearance is a process outcome, not a purchase order line. Decide the alloy, write the gradient direction on the drawing, agree the racking, and approve a physical sample before volume runs. Do those four things and the color debate moves from the loading dock to the design meeting, where it belongs. If you want a second opinion on the drawing before tooling or material is committed, request a DFM and finishing review and send the color reference with it.
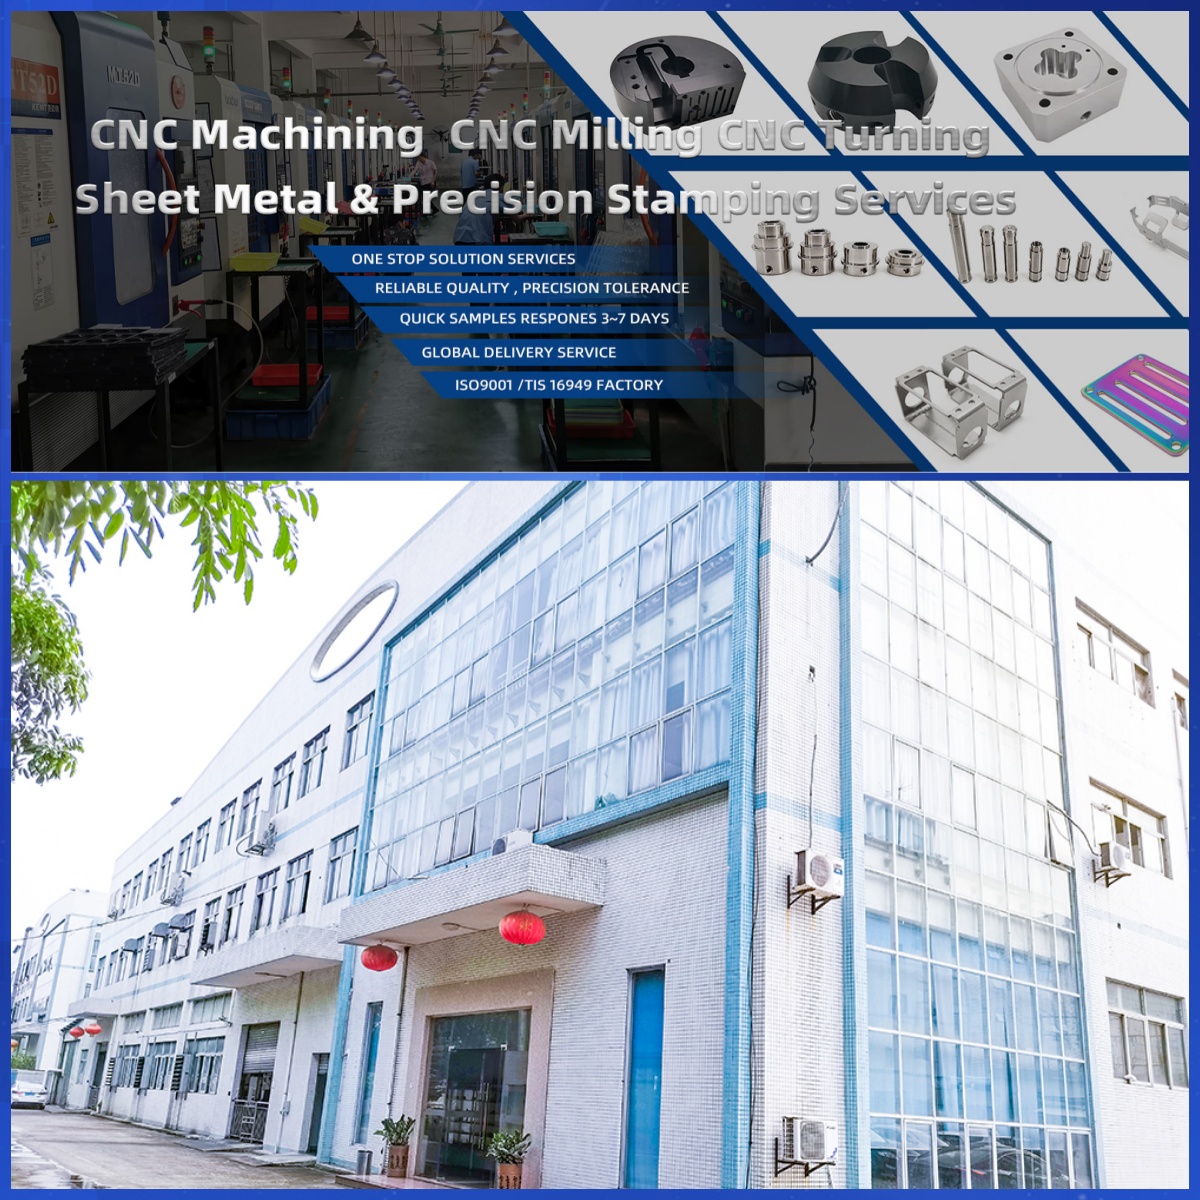
DongGuan YiTai Electronic Technologies Co.,Ltd
DongGuan YiTai Electronic Technologies Co.,Ltd is a manufacturing service provider located in Dongguan, China.
YiTai specialized in CNC turning machining and sheet metal fabrication mainly. As a member of Hung Mou Group, we focus on the overseas marketing development. And based on our parent company’s manufacturing capability and resources, YiTai also expended machining services such as die casting, injection molding, aluminum profile extrusion, 3D printing, which are committed to providing customers with one-stop purchasing services and experience.
CNC MACHINING , CNC MILLING , CNC TURNING , SHEETMETAL , FASTENER , OTHERS




Gang Tool vs Turret CNC Turning: How to Choose
Sheet Metal Embossing: Design Rules, Tooling, and Applications
Related Article